> ## Documentation Index
> Fetch the complete documentation index at: https://docs.synk.to/llms.txt
> Use this file to discover all available pages before exploring further.
# Connect Jira Cloud to Synk.to
> Guide on connecting Jira Cloud to Synk.to
Prerequisites:
1. Atlassian account with "Administer Jira" global permission
2. Jira Cloud site URL (e.g., [https://your-domain.atlassian.net](https://your-domain.atlassian.net))
## **Step 1**: **Create an API token from your Atlassian account**
1. **Log in** to your [Atlassian account](https://id.atlassian.com/manage-profile) with account that have “**Administer Jira**” [global permission](https://support.atlassian.com/jira-cloud-administration/docs/manage-global-permissions/).
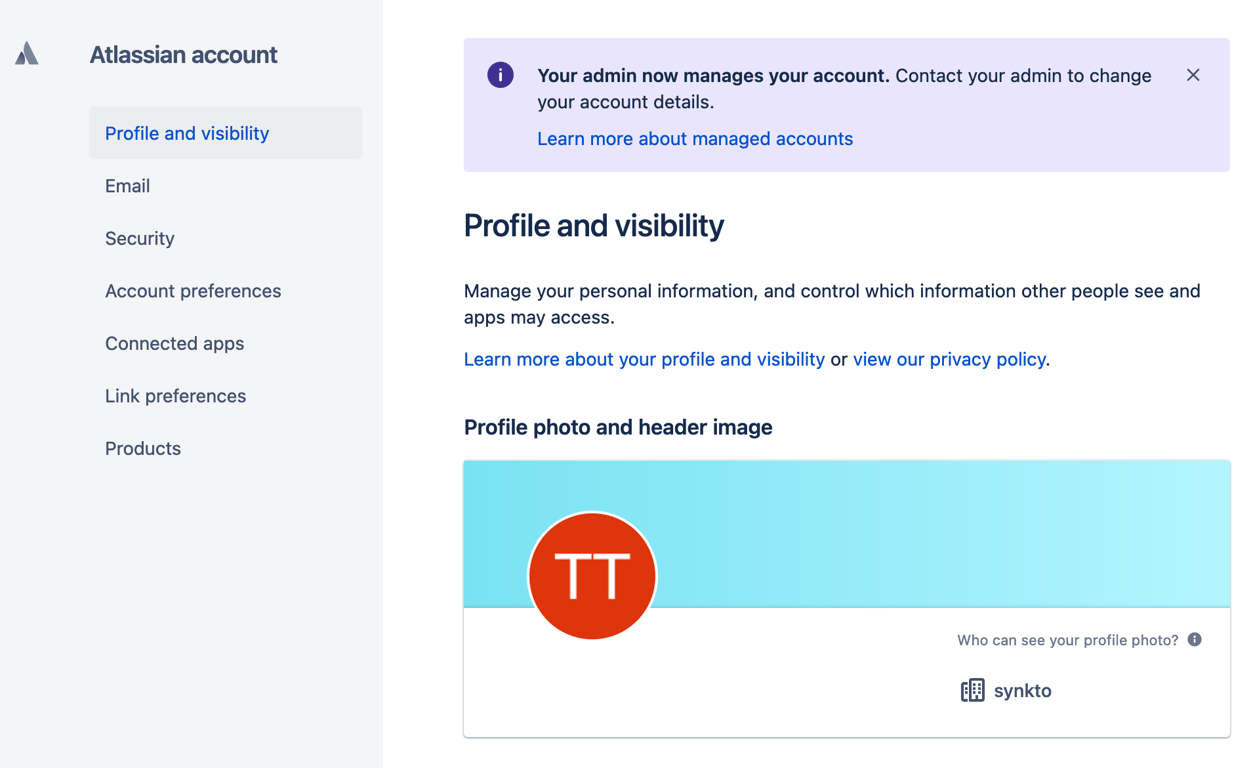
2. Go to **Security** → “[Create and manage API tokens](https://id.atlassian.com/manage-profile/security/api-tokens)” or just click [https://id.atlassian.com/manage/api-tokens](https://id.atlassian.com/manage/api-tokens).
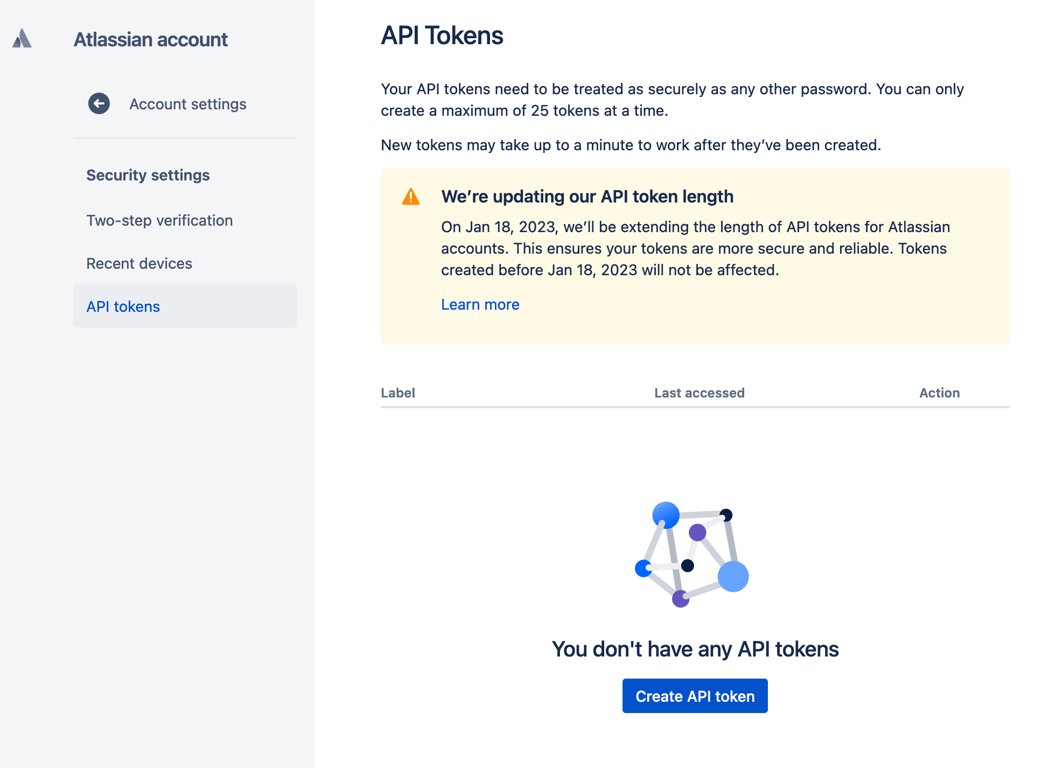
3. Click **Create API token**.
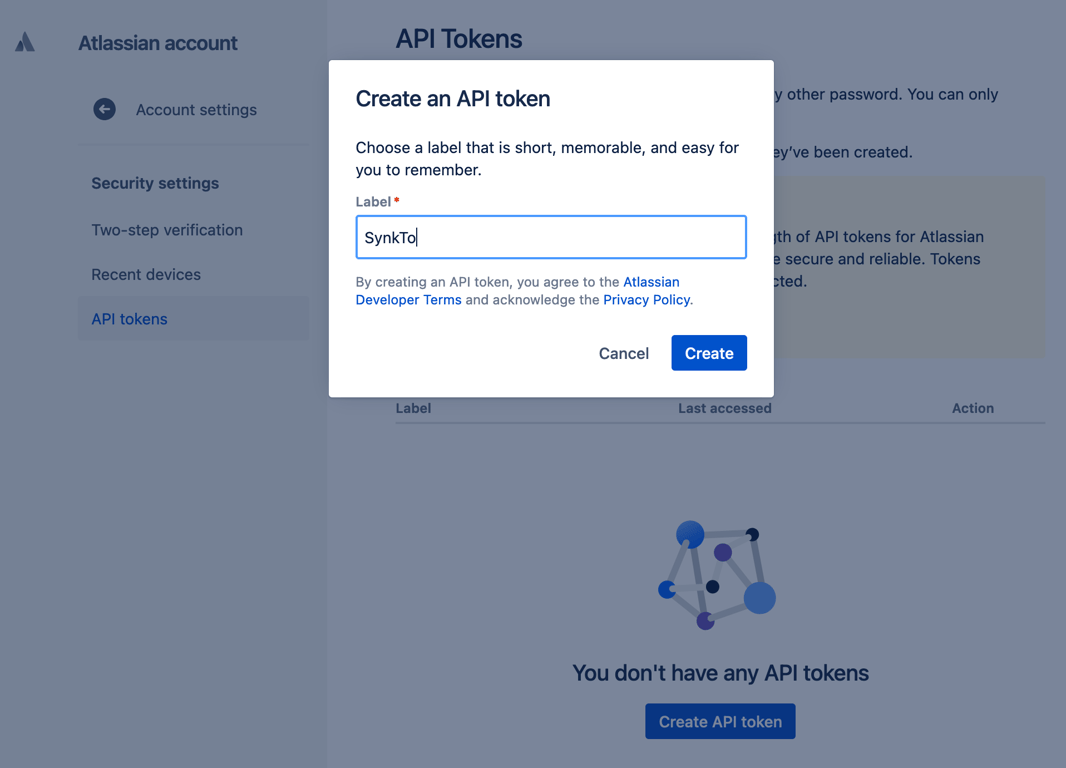
4. From the dialog that appears, enter "**SynkTo**" as the **Label** for your token and click **Create**.
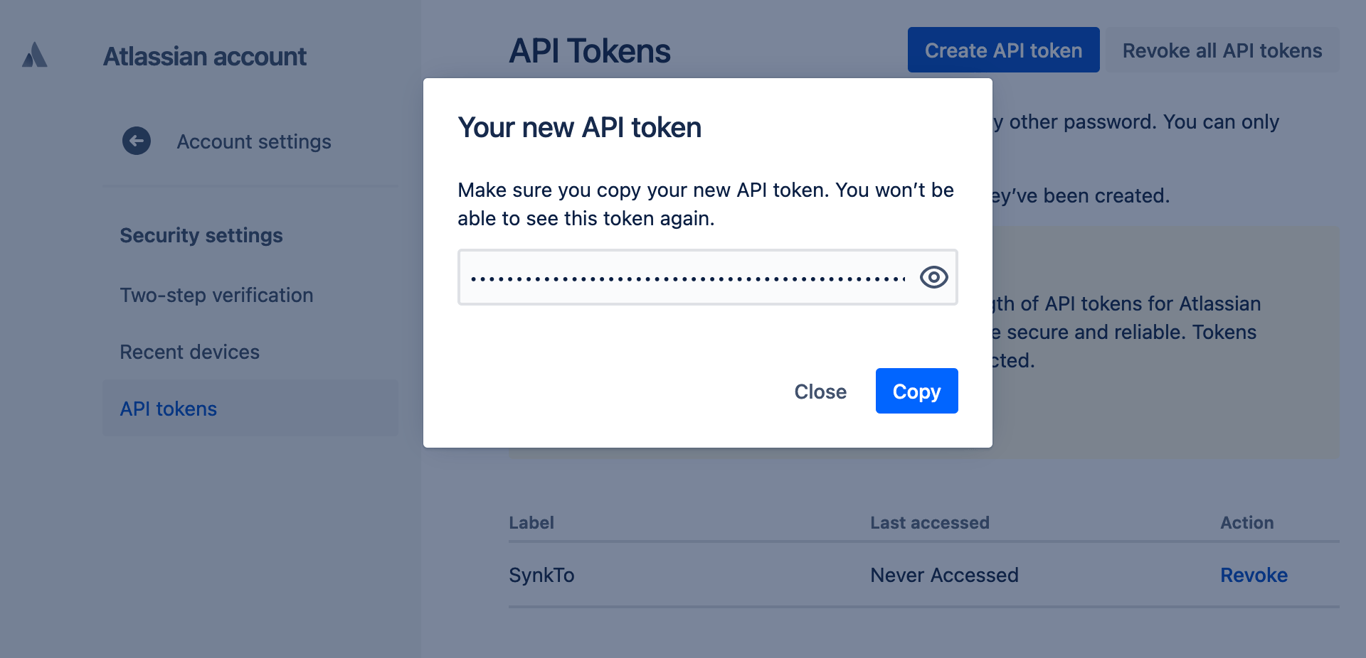
5. Click **Copy** and save the **API token**. Note that for security reasons it isn't possible to view the token after closing the creation dialog; if necessary, create a new token.
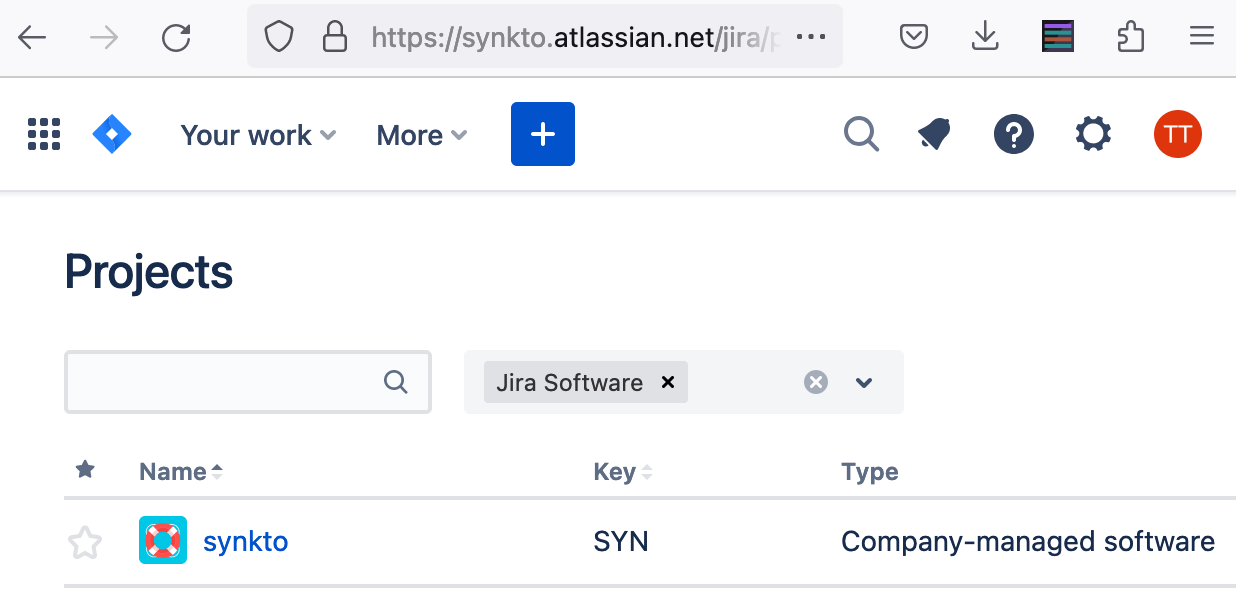
6. Get your **Jira Cloud site URL**. It should look like: [https://your-domain.atlassian.net](https://your-domain.atlassian.net/)
## Step 2. Connect Jira Cloud to Synk.to
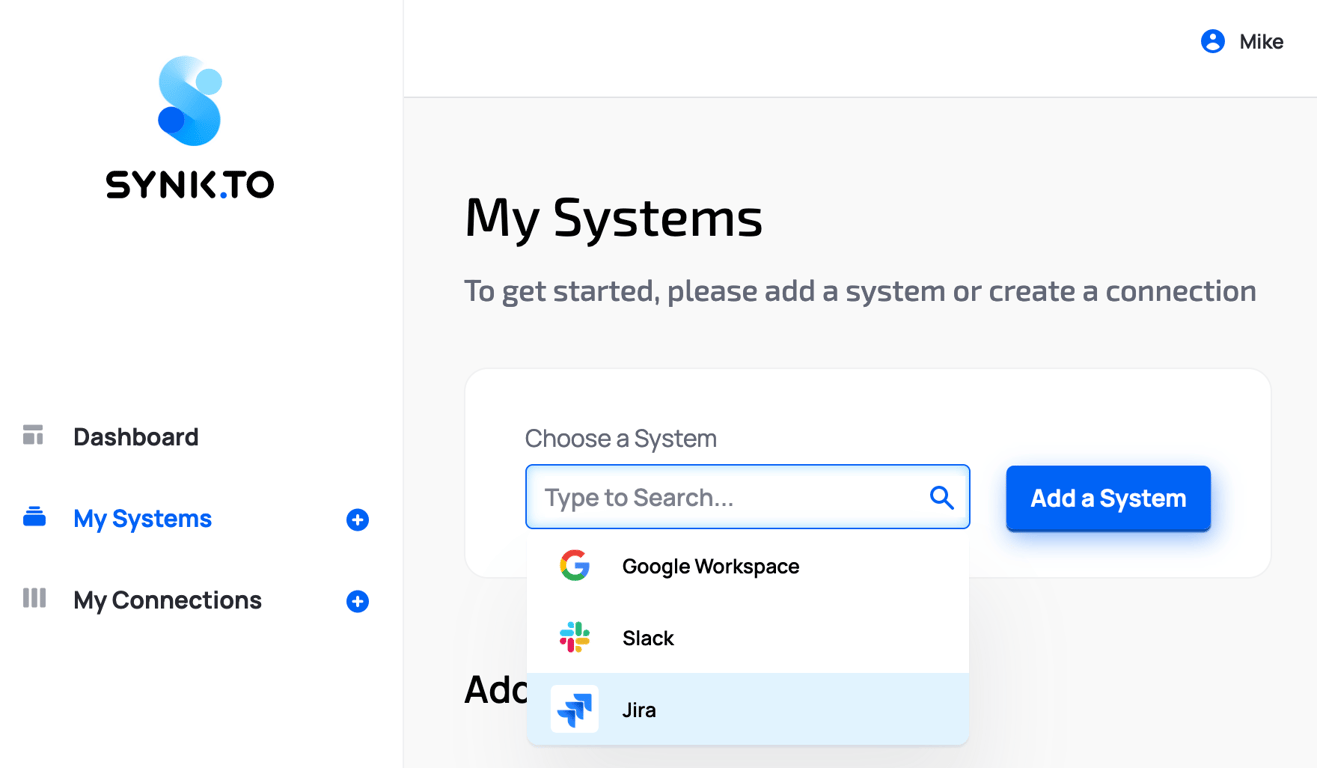
1. Go to the [SynkTo Systems](https://app.synk.to/systems) page, find **Jira** in “Choose a System” field, and click “**Add a System**”.
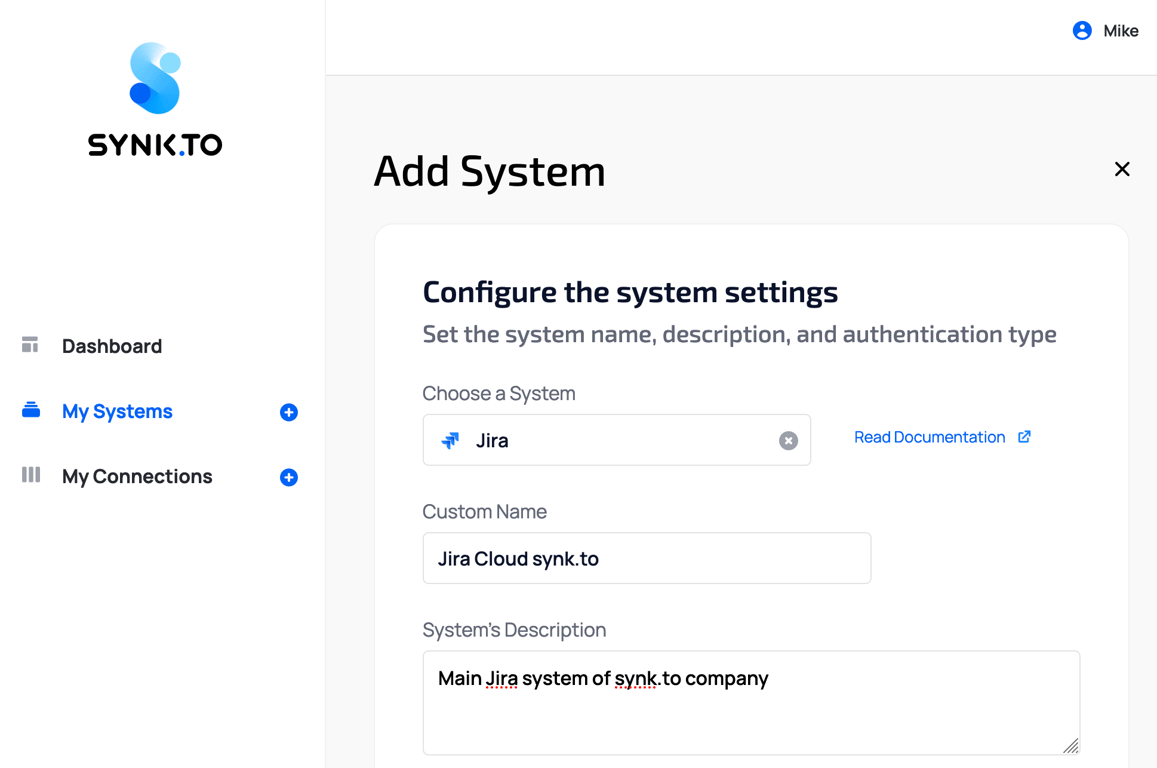
2. Provide “**Custom Name**” and “**Description**” to the system in order to remember it. It will be used in “My Connections” section.
3. In “**Authentication settings**” provide your “**Atlassian account email address**”, “**Jira site URL**”, “**API Token**” from Step 1 of the guide, and “**Jira project name**” (the list of the projects can be found at [https://your-domain.atlassian.net/jira/projects](https://your-domain.atlassian.net/jira/projects)).
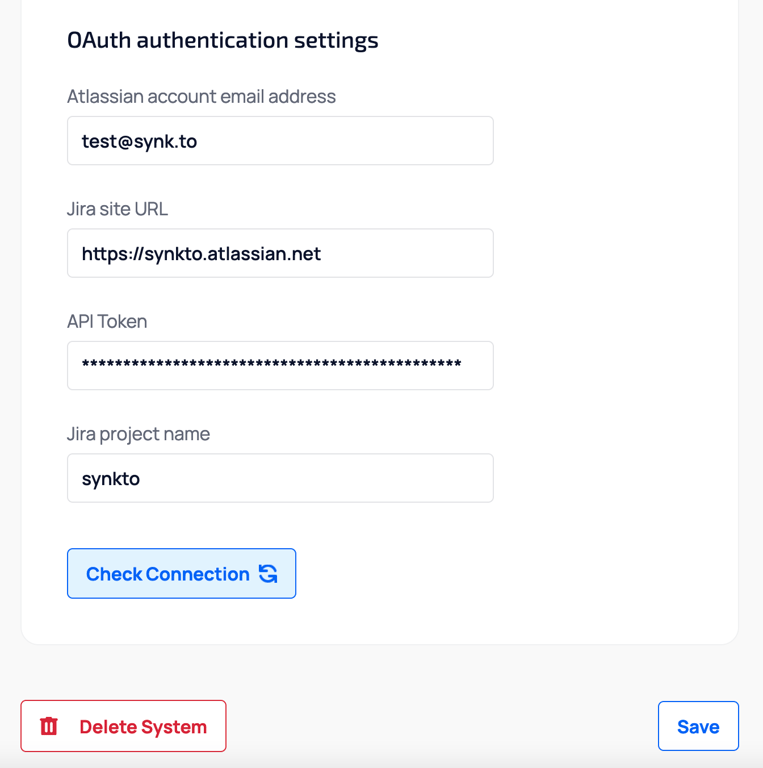 4. Click “**Check connection**”.
5. If everything is fine, you will see “**Account Connected**” green mark and the number of users and groups in the system in the bottom.
4. Click “**Check connection**”.
5. If everything is fine, you will see “**Account Connected**” green mark and the number of users and groups in the system in the bottom.
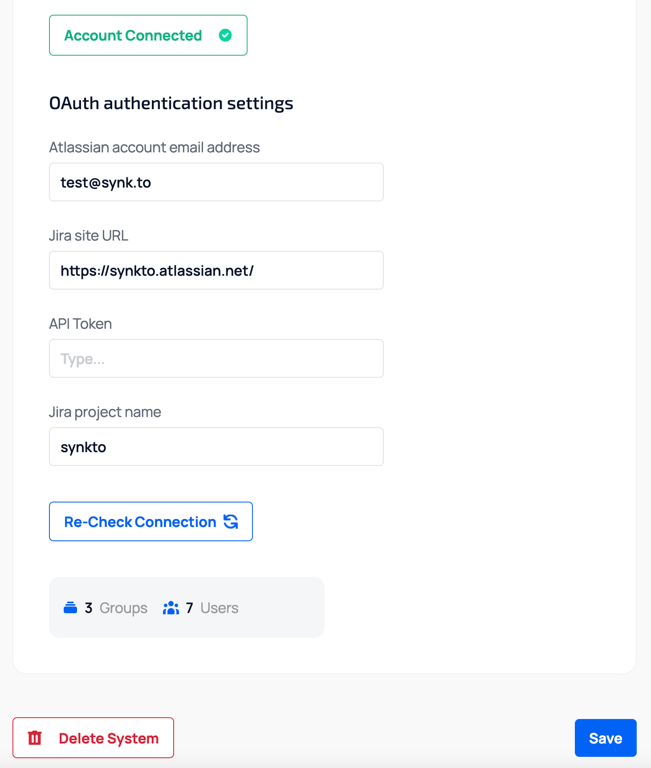 6. Click “**Save**” and you will see the system in My Systems list. Congrats!!! Now you can use it in “My Connections” section of Synk.to.
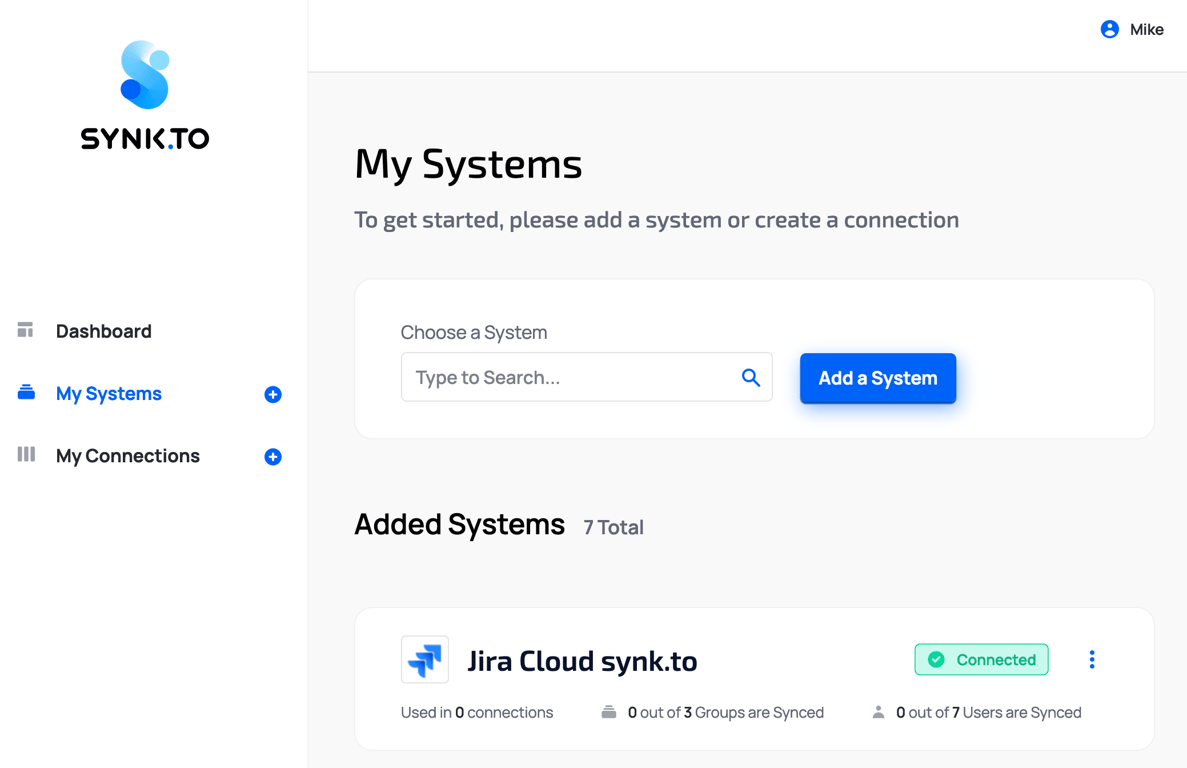
6. Click “**Save**” and you will see the system in My Systems list. Congrats!!! Now you can use it in “My Connections” section of Synk.to.
